Wood Burning Stove Pipe
A Wood Burning Stove Pipe is more than just a metal tube. It’s the essential link between your wood stove and the chimney, carrying smoke safely out of your home. If you’ve ever wondered how it works, the different types available, or what installation rules you should follow, now I breaks it down in simple, clear steps.
How Does a Wood Burning Stove Pipe Work?
At its core, a stove pipe creates a pathway for smoke and gases from your stove to escape through the chimney. As the wood burns, hot air rises, creating draft. The pipe directs this draft upward, ensuring smoke exits instead of lingering inside.
The pipe also helps control heat. With proper design, it maintains airflow, making your stove burn wood more efficiently and heat your room better.
A related guide for you check it out:
Drolet Wood Stoves
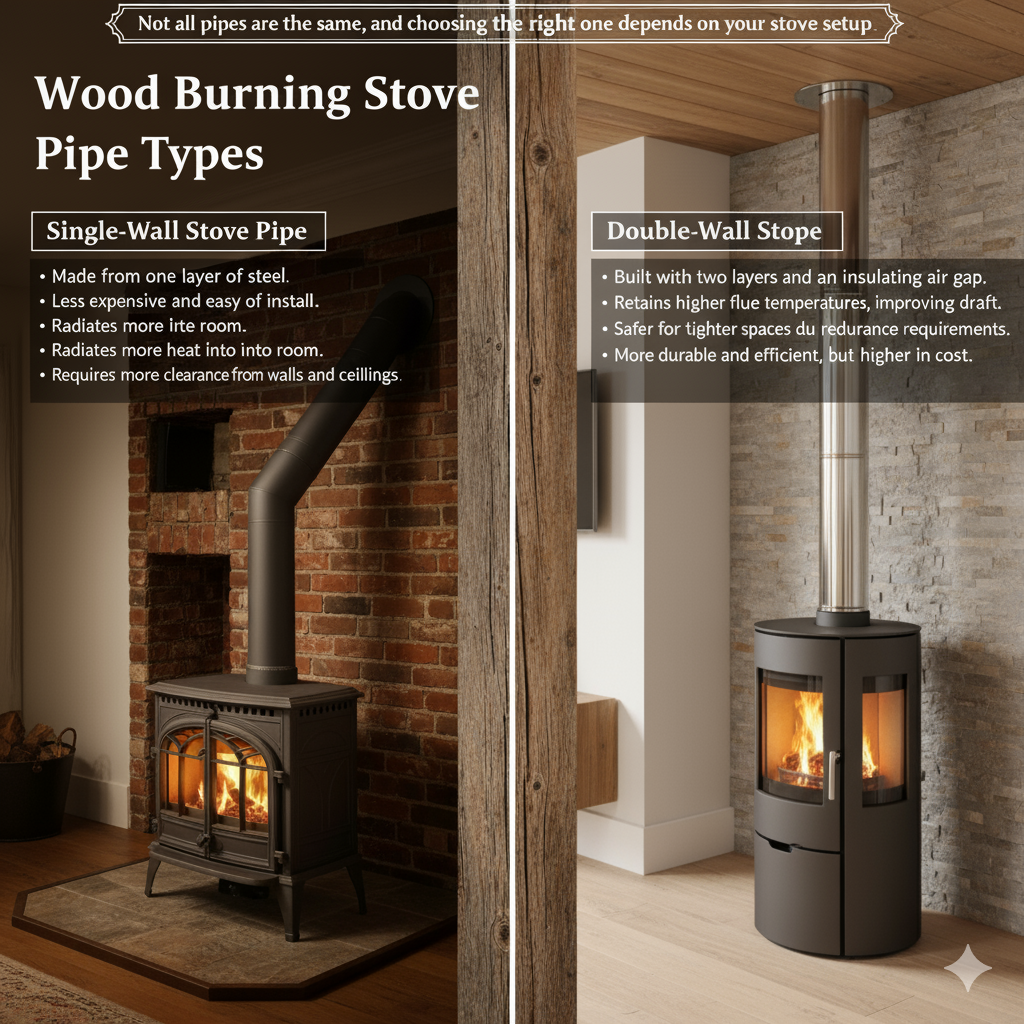
Wood Burning Stove Pipe Types
Not all pipes are the same, and choosing the right one depends on your stove setup.
Single-Wall Stove Pipe
- Made from one layer of steel.
- Less expensive and easy to install.
- Radiates more heat into the room.
- Requires more clearance from walls and ceilings.
Double-Wall Stove Pipe
- Built with two layers and an insulating air gap.
- Retains higher flue temperatures, improving draft.
- Safer for tighter spaces due to reduced clearance requirements.
- More durable and efficient, but higher in cost.
Read Also:
Quadra Fire Wood Stove
Double Wall vs Single Wall Stove Pipe
When comparing double wall vs single wall stove pipe, think about your space and budget.
- Single Wall:
Great for open spaces with enough clearance. More affordable but not as efficient in holding heat. - Double Wall:
Better for long-term efficiency and safety, especially in small or well-insulated rooms.
If you want to save on initial costs, go single-wall. If you’re investing for long-term safety and performance, double-wall pays off.
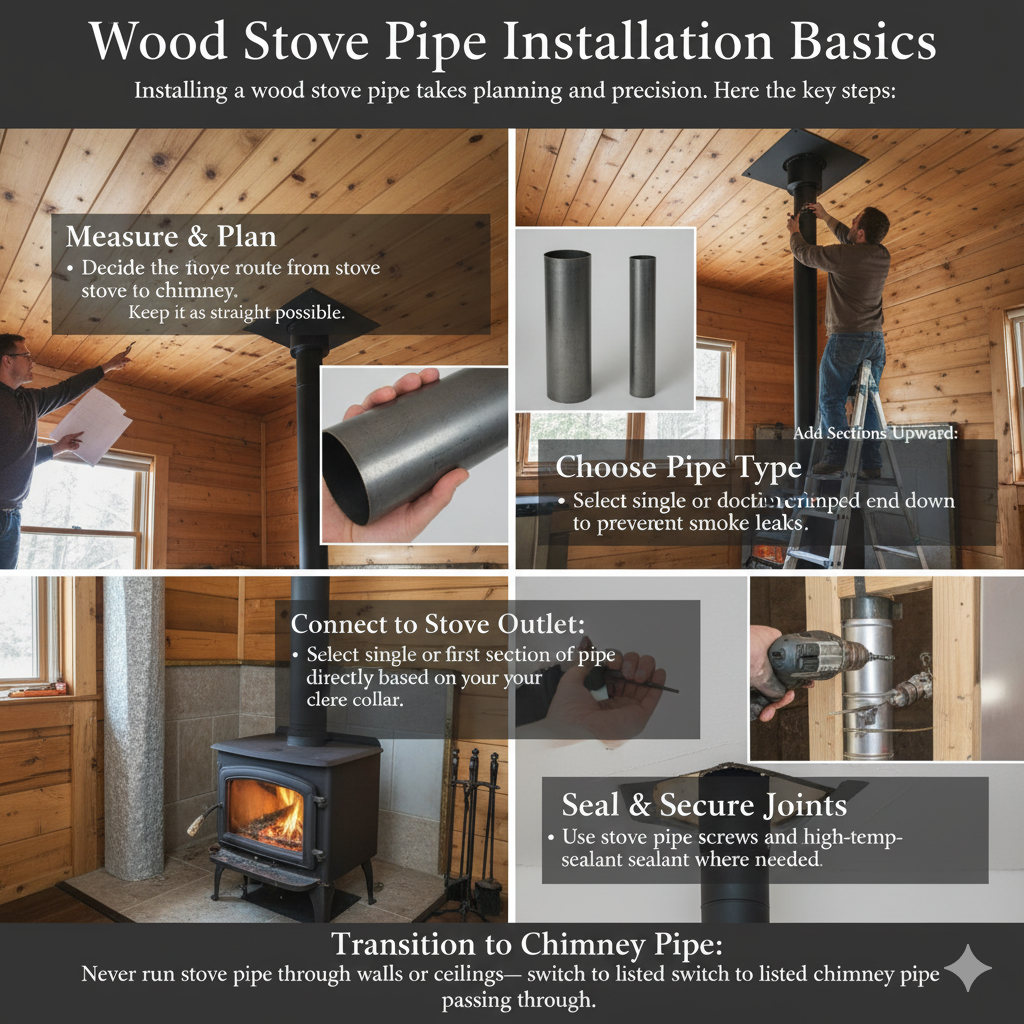
Wood Stove Pipe Installation Basics
Installing a wood stove pipe takes planning and precision. Here are the key steps:
- Measure & Plan:
Decide the pipe route from stove to chimney. Keep it as straight as possible. - Choose Pipe Type:
Select single or double-wall based on your clearance needs. - Connect to Stove Outlet:
Secure the first section of pipe directly onto the stove collar. - Add Sections Upward:
Install each section crimped end down to prevent smoke leaks. - Seal & Secure Joints:
Use stove pipe screws and high-temp sealant where needed. - Transition to Chimney Pipe:
Never run stove pipe through walls or ceilings—switch to a listed chimney pipe when passing through.
You may be interested in:
Ashley Wood Burning Stove
Wood Stove Pipe Clearance Requirements
One of the most important rules when working with stove pipes is clearance.
- Single-Wall Pipe: Needs at least 18 inches from any combustible surface.
- Double-Wall Pipe: Requires as little as 6 inches, depending on the manufacturer.
Always check local building codes and your stove manual, since requirements can vary.
Maintenance Tips for Longevity
A stove pipe isn’t “set and forget.” Regular care ensures safe and efficient performance.
- Clean your pipe and chimney at least once a year.
- Check for creosote buildup, a flammable residue from wood smoke.
- Inspect joints and screws to ensure nothing has loosened.
- Replace worn or rusted sections immediately.
Our very recently published article:
The Stoves Nest
Pellet Stove Igniter
Conclusion
A wood burning stove pipe may look simple, but it plays a critical role in both safety and efficiency. By understanding how it works, the different types available, and the right installation rules, you can enjoy the warmth of your stove with peace of mind. Whether you choose single-wall or double-wall, proper setup and maintenance make all the difference.